| Part1 | Part 2 | Part 3 | Part 4 |
The Robbe schooner On The Water
Patrick Matthews © 2006
In the last three issues, we built up Robbe’s 1:20 r/c kit of the schooner Valdivia. This is no small model, and it’s not a trivial task to get it to the lake for a day of sailing. In this final segment, we’ll look at what it’s like to cope with the world of large-scale sail.
On The Road
Previous experience with large models has taught me that a well-designed cradle is essential. I’ve seen modelers show up at events with everything from custom-built moving crates to bare models laying in the back seat. At a minimum, the cradle should secure the model in all expected driving conditions—during accelerations and emergency braking, through cornering and over bumpy roads. The model and cradle shouldn’t slide around, but if they or anything else in the car do move, it’s good if the cradle establishes a perimeter that will keep sliding objects from banging on the model.
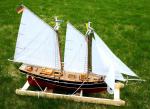
The cradle provided by Robbe is suitable for supporting Valdivia during construction, but not for motor transport. It also adds to the overall height of the package, as it presents the hull in floating trim, with the keel rising towards the bow, and the schooner mast elevated. So my first step was to build a new “transport” cradle.
This new cradle is simply constructed from 1×3 stock, and uses hull supports patterned from the Robbe cradle. Make sure to include a longitudinal beam to support the length of the keel and its lead ballast blocks. Simple felt padding protects the paint. Since the bottom of the keel is now level, the boat travels in a bow-down mode, leaving more headroom forward.
Early in the program, I sought out lessons-learned from an experienced Valdivia sailor, Taylor Sparks of Ohio. Taylor told me how he realized the importance of securing the model to the cradle after building a new bowsprit, the result of a hard stop. I was thinking about complicated wooden supports with hinges and padded blocks to secure model to cradle, but Taylor showed me that I could simply lash the model down to accomplish the same goal. I used very soft braided nylon line of 3/16″ diameter, tied to eyes on one side and secured to cleats on the other. This allows for quick removal and adjustment of the lines.
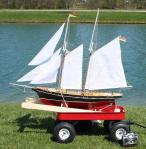
Next, I needed to consider transport between the car and the pond. I could picture myself struggling with an awkward model a hundred yards over bumpy paths, and decided that Taylor had the solution again. He uses a large garden cart with pneumatic tires, but I elected to use a classic red wagon outfitted with its own balloon tires. The cradle was designed to fit into the wagon but the boat still dangles off the back. No problem, since the center of gravity is still well within the wagon.
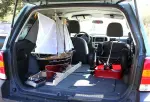
Now we need to get the kit into the car. Owners of vans—mini and full sized—should have little difficulty. I have a compact SUV, and the model is a tight squeeze through the rear hatch, with transom kissing tailgate and the bowsprit scratching the back of the driver’s seat. The key here is dropping the topmasts and lowering the main gaff a bit, and then tilting the model a bit as it’s slid in through the hatch.
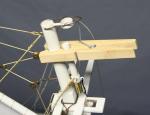
Robbe has designed the Valdivia to allow for quickly dropping the topmasts. The upper stays and shrouds are attached to removable mast tips, so the topmasts can be dropped without disconnecting any rigging. Another tip from Taylor: Make clips to hold the removable tips onto the mainmasts, or else they’ll twirl around and put the stays into a hopeless tangle. I used modified clothespins for the job. And a tip from me: The topmasts have small plastic pins that lock them in place… these go missing quite easily at the pond, so make some extras!
If you must combine Valdivia ownership with a smaller vehicle, then you’ll have extra challenges. Both the bowsprit assembly and the lower masts are removable, after a fashion. The lower shrouds can be disconnected from their hooks at the cross trees, but many of the other lines don’t come off, and the booms aren’t able to pivot up parallel to the masts. This means that the model with masts lowered is in about the same state of affairs as a ship dismasted at sea, and it takes about as much work to put it all right again. I tried this once, and don’t care to try it more times in order to get better at it. But merely dropping the topmasts is an easy affair.
More Preparations
Ready to sail? Not quite yet! Before going anywhere, make sure the electronics are ready. Main and radio batteries need to be topped off, and the r/c functions need to be checked out. Exercise all the winches, ensuring that each line runs in the expected direction. A single winch controls the main, schooner, and foresail sheets through different mechanical advantages. Close-hauled, the main boom is very nearly snugged down and on-center, while the schooner boom has a few degrees of play, and the foresail boom can swing about 10° off center. I managed to wind the foresail sheet the wrong way around it’s drum, so it was letting out when the mainsail was being hauled in.
The jib and flying jib’s sheets are attached to an endless loop wound on a second winch drum. Somehow one of these sheets slipped at the jib’s clew, which caused some unexpected tension in the endless loop on one tack, which in turn caused the loop to fall off its drum. After correcting this issue, I realized that the two jibs needed to have their sheets adjusted relative to one another, so that each jib would fill the same amount. This was easily checked on the workbench by pointing a fan at the model.
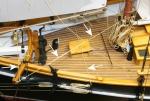
Robbe suggests stringing a couple lines from the main shrouds to the forward handrails in order to protect the schooner sheet from a snag-point. One more Taylor Tip: Run an additional line in a triangle from the catheads to the schooner mast, which will help keep jib sheets from catching in the busy area on the foredeck.
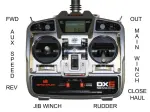
And how about the radio’s controls? Two-stick, four-function radios are commonly used for schooner models. Typically the right hand stick’s vertical motion sets the main sheet—down is close hauled, up is out. Right hand stick side-to-side controls the rudder, and left hand stick side-to-side hauls the jib sheets port-to-starboard. That leaves left hand stick vertical motion for the auxiliary drive, which is quite natural.
Most radios allow for a choice between spring-centering and ratcheted motion on the vertical axes. You can also disconnect both spring and ratchet for a “floppy” stick. I chose to use a ratchet on the main sheet, spring centering on the rudder and auxiliary drive, and “floppy” on the jib sheets. I’d prefer to have the jib sheets ratcheted, but that wasn’t an option on my radio.
Also, make sure to choose a radio that allows for end-point adjustment on each function—critical for adjusting the sail winch travel, and handy for setting the rudder movement. I’m using the new Spektrum DX6 2.4 gigahertz radio, which has computer memory for all the settings.
Basic maneuvering
Before ever setting your model in the water, you’ll want to know something about sailing! If you already know how to sail, then the next few paragraphs are only for your amusement—you won’t learn much from me!
Basic concept: By adjusting rudder and sail trim, you can sail in many directions, but not dead into the wind… in fact, the “no go” zone is maybe 35° to either side of the wind. How closely a boat is able to “point” into the wind can be a bragging point for a skipper, because when the objective is to windward, he who can point up closer will get there sooner. Progress in the windward direction is made by “tacking”—zigzagging to either side of the wind, which requires turning the boat’s head through the wind. This needs to be accomplished smartly, as the way to stop a sailboat dead in its tracks is turn straight into the wind with the sails flapping (“luffing”). So, you need use the boat’s momentum to get through the maneuver, which can be challenging in times of very light wind. Also, if the main and schooner booms were let out a bit on one tack, they’ll come swinging over to the other side with a “thwack!”—to avoid looking the part of the lubber, you’ll want to haul in the booms’ sheets during the turn, and let them back out gently as you go through the turn. You can leave the jibs close-hauled on one side, make the turn, and as they fill again the jibs will help with the turn. Once around, the jibs can be hauled over to the other side.
An alternative maneuver to tacking is “wearing away”, which might be required in a calm breeze. This is a 270° turn away from the wind, which will involve a “gibe”—a turn with the wind aft that shifts the breeze from one side of the stern to the other. When running down-wind, it’s common to have the booms out quite a bit. Again, you’ll want to haul in the booms before this maneuver, or risk a violent bang when the booms shift from one side to another.
You’ll be on a “reach” whenever the wind is coming abeam. This is also when you’ll find the most “healing” in a fresh breeze. Without a keel extension, Valdivia easily puts her rails under water in a reach. Letting out the sails will spill some wind if the healing is excessive, or you can try pointing into the wind a bit.
Of course, there’s nothing like learning from a pro, and I’m nothing like a pro. It’s good if you can hook up with a local AMYA sailing club, and see if someone will give you some practice time at the stick.
How’d she do?
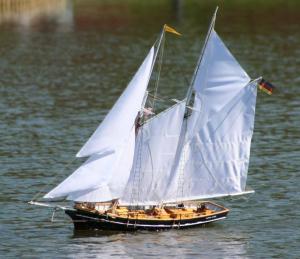
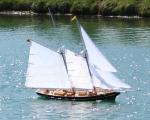
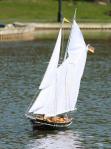
I approached the lake with trepidation, not only because this was my first time at the helm of an r/c schooner, but because there was a gusty breeze, and I knew that the Valdivia model was designed for sailing in light winds. I decided to go in without the upper canvas—the topsail and fisherman sail—as this would minimize the healing.
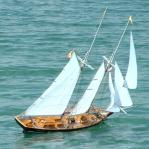
Still, I was delighted with the ease and grace that she exhibited. A few times I found myself on a broad reach when a strong gust came along, and while she’d put her lee deck under water, she kept moving along smartly, and no water ever came into the hull.
I felt that she wasn’t pointing up well, and was sluggish coming about while tacking, but I’ll chalk that up to the misadjusted foresail and jib sheets. I did notice a good bit of crabbing—slipping sideways—as the scale keel just can’t bite into the water with the same effect as with the 1:1 version. If one wants to sail seriously, a keel extension should be built in as the very first step in construction. I’ve also seen schooner skippers add extensions to the rudder, which should help in coming about. Otherwise, she does just fine when prowling about the pond.
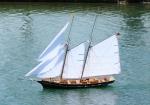
On my second venture to the water, I made sure that all was well with the sheets, and being a calmer day, I rigged the topsail. The fisherman’s sail was left off, but mainly because it was more work to rig. This time I felt the boat was tacking better, but I wasn’t completely sure, because the breeze was so light. One last Taylor Tip: If you can’t quite get her head to come around in a tack (and if nobody is watching), just goose the auxiliary drive—works like magic!
Another suggestion for beginners: Don’t expect your model to look “brand new” for long! I brought home some of the pond’s bank in the jib boom, and left a little bit of paint on its rocks. Pond water will leaves spots on the sails, and stains on the teak deck. And do be careful moving her around, as the jib and main booms seem to grow like Pinocchio’s nose when the model is being maneuvered through doorways.
But is it all worth it? Here’s one happy skipper that says “Yes”!
Patrick Matthews

